True albino mushrooms have a reputation for being finicky, temperamental, and reserved for advanced cultivators. Yeti 168 flips that script entirely. This true albino Teacher isolation produces pure white specimens with remarkable genetic stability, and it does so without the frustrating inconsistency that plagues most albino genetics. If you've been waiting for the right entry point into albino cultivation, this is the strain that was built for you.
Yeti 168 traces back to the community-driven isolation work that has produced some of the most respected strains in modern mycology. Through careful selection and refinement over multiple generations, this 168 variant was stabilized specifically for reliability. The result is a true albino that colonizes with confidence, fruits without drama, and delivers ghostly white specimens that look stunning under any lighting condition.
This guide covers everything you need to grow Yeti 168 successfully on your first attempt. From substrate preparation through harvest timing, every section is written with straightforward techniques that work whether this is your first albino grow or your fiftieth.

What Makes Yeti 168 Special
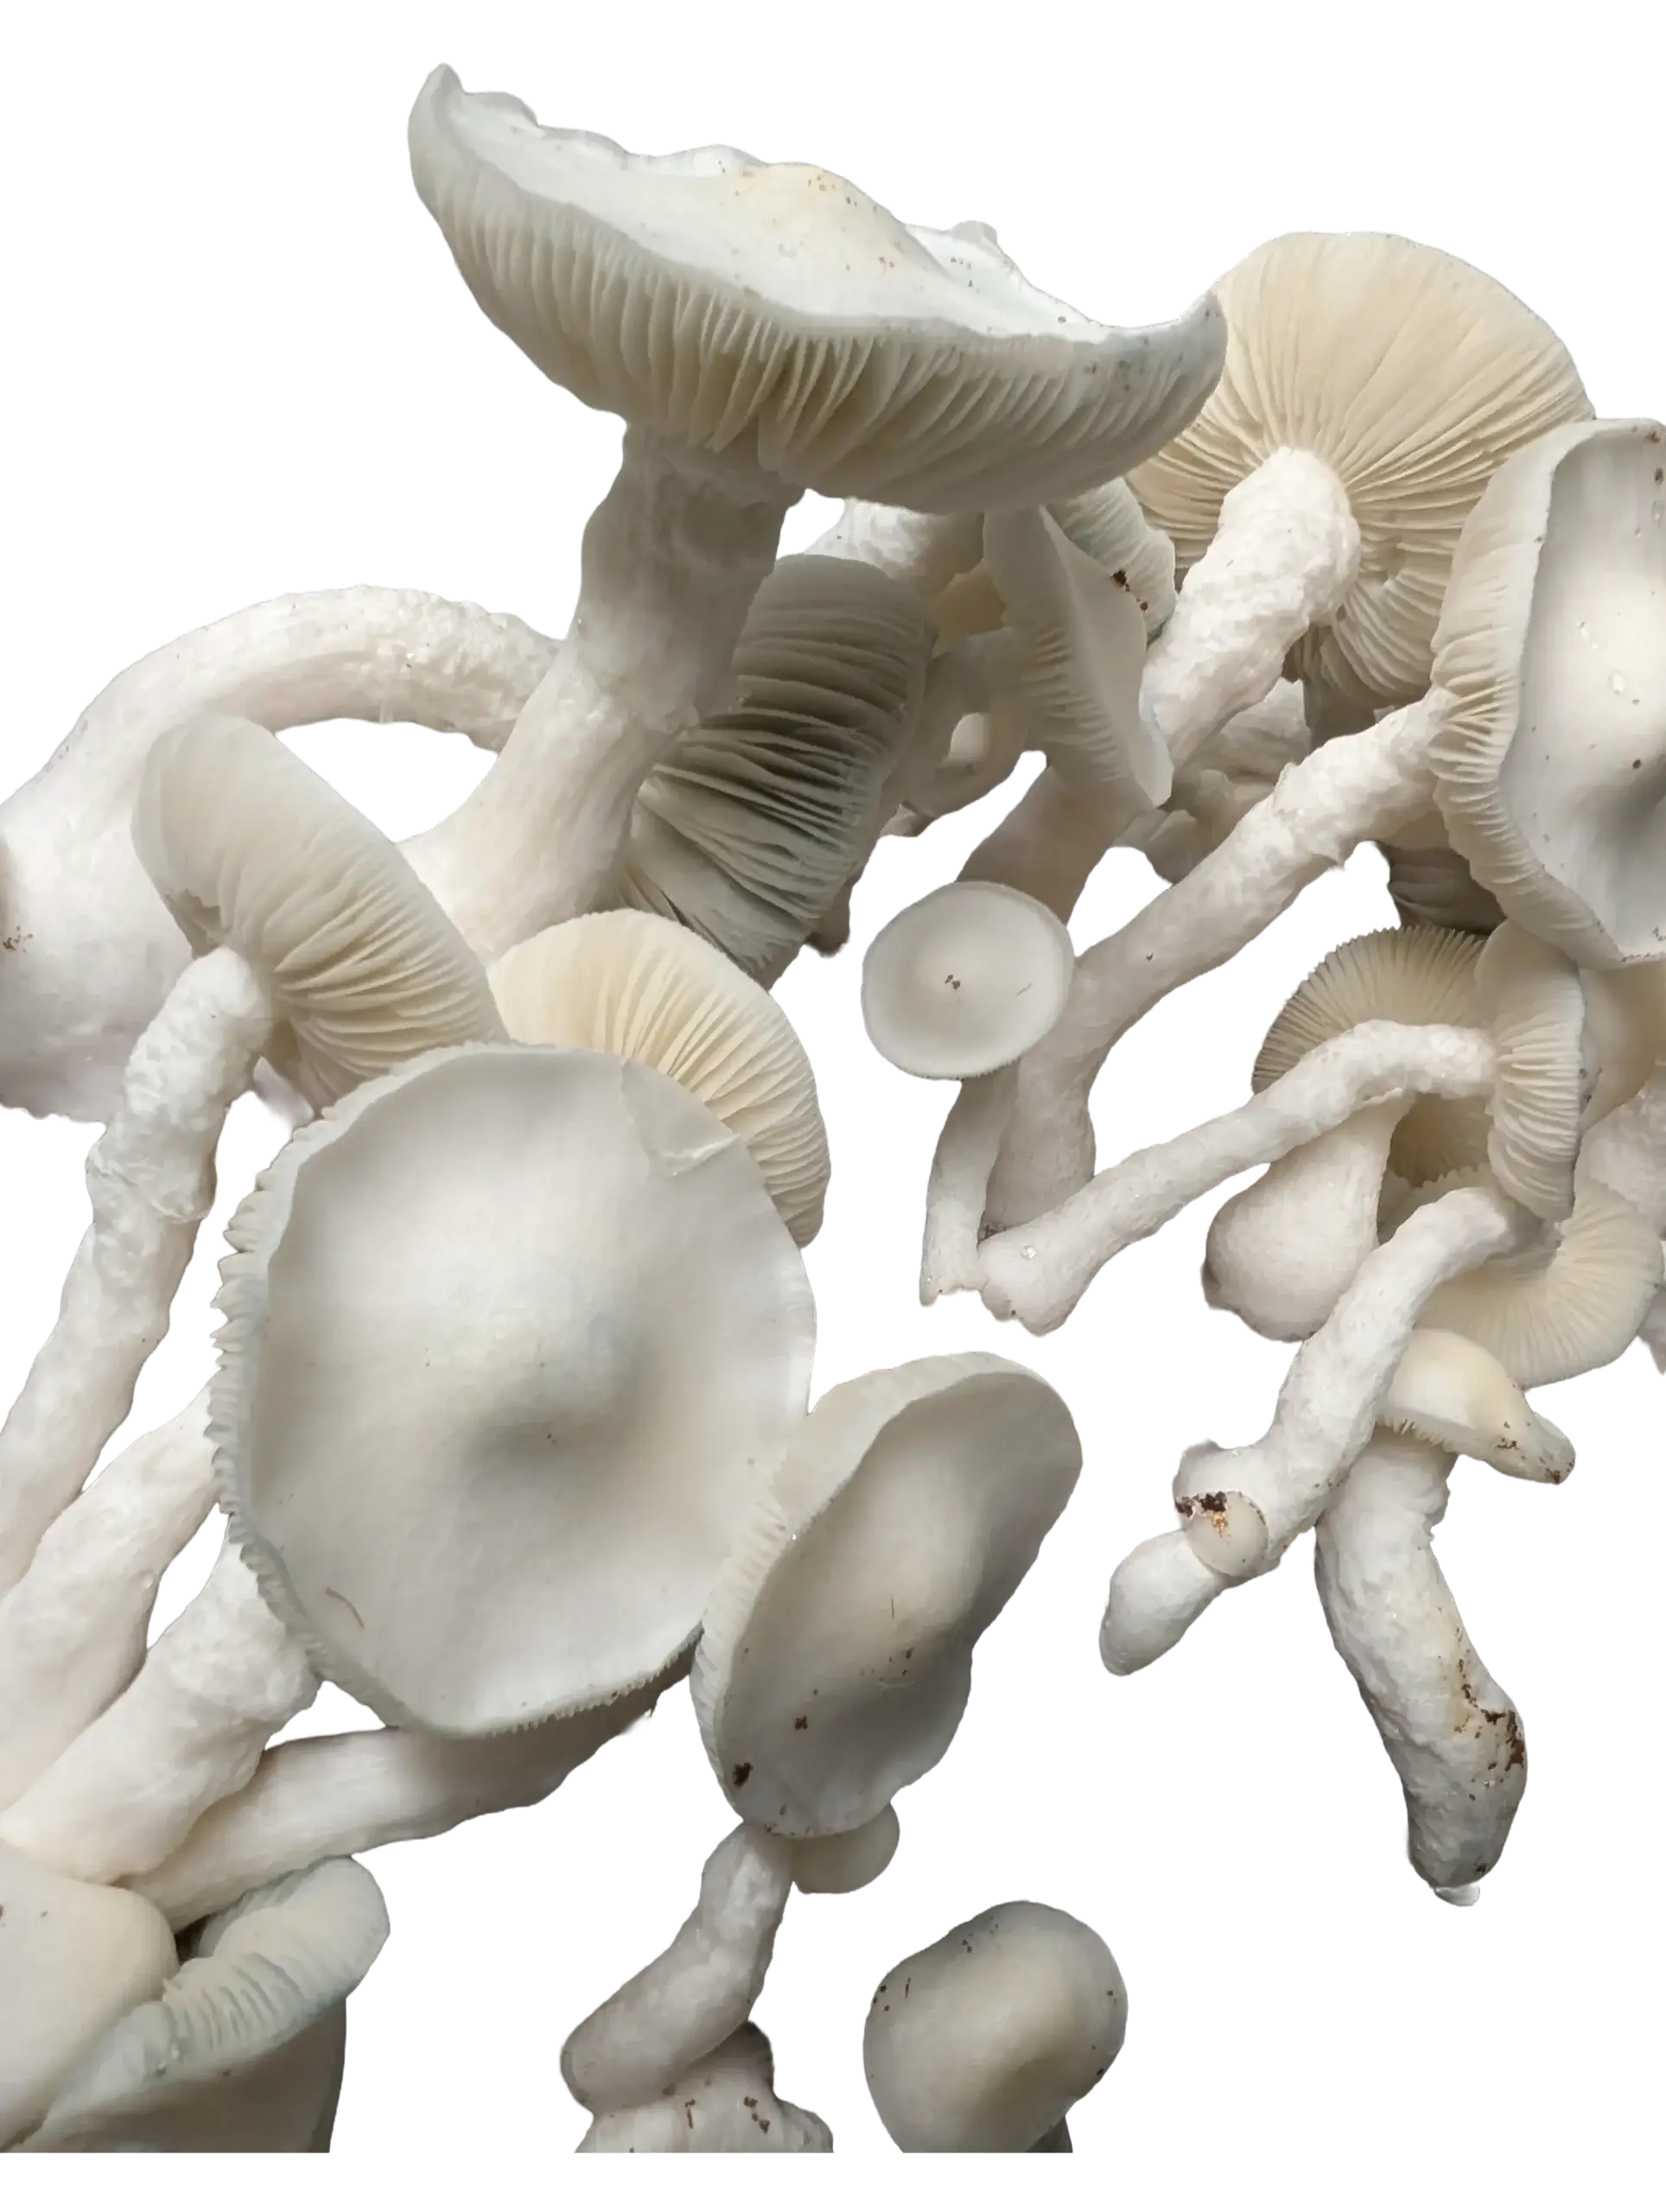
Yeti 168 is a true albino isolation of the Golden Teacher lineage. "True albino" means complete absence of pigmentation throughout the entire fruit body, from cap surface down through the stem. This is different from leucistic strains like Jack Frost, which produce white-appearing fruits but still carry some pigment in their spores and gill tissue. Yeti 168 produces translucent to very light spores, and every visible surface stays consistently white.
The 168 designation refers to a specific isolation within the broader Yeti lineage. This variant was selected through multiple generations of careful work, prioritizing two things above all else: genetic stability and growing reliability. That focus on eliminating the inconsistency problems that make most albino strains frustrating is what sets this isolation apart from earlier Yeti work and from albino genetics in general.
The practical result is an albino strain that behaves more like a well-established standard cubensis variety during cultivation. Colonization is steady and predictable. Fruiting triggers work on the first attempt. And the albino expression holds consistent across generations without reverting to pigmented fruits, which is the single biggest complaint growers have with other albino genetics.
What Sets Yeti 168 Apart From Other Albino Strains
True Albino Expression: Complete absence of pigmentation from cap to stem, with translucent spores. Unlike leucistic varieties, Yeti 168 carries no hidden pigment in gill tissue or spore deposits.
Genetic Stability: Consistent albino expression across multiple generations without reverting to pigmented or mixed batches. This reliability is rare in albino genetics and makes Yeti 168 valuable for ongoing research.
Beginner-Accessible Growing Profile: Colonization speed, contamination resistance, and environmental tolerance all fall within ranges that newer cultivators can manage confidently with standard equipment.
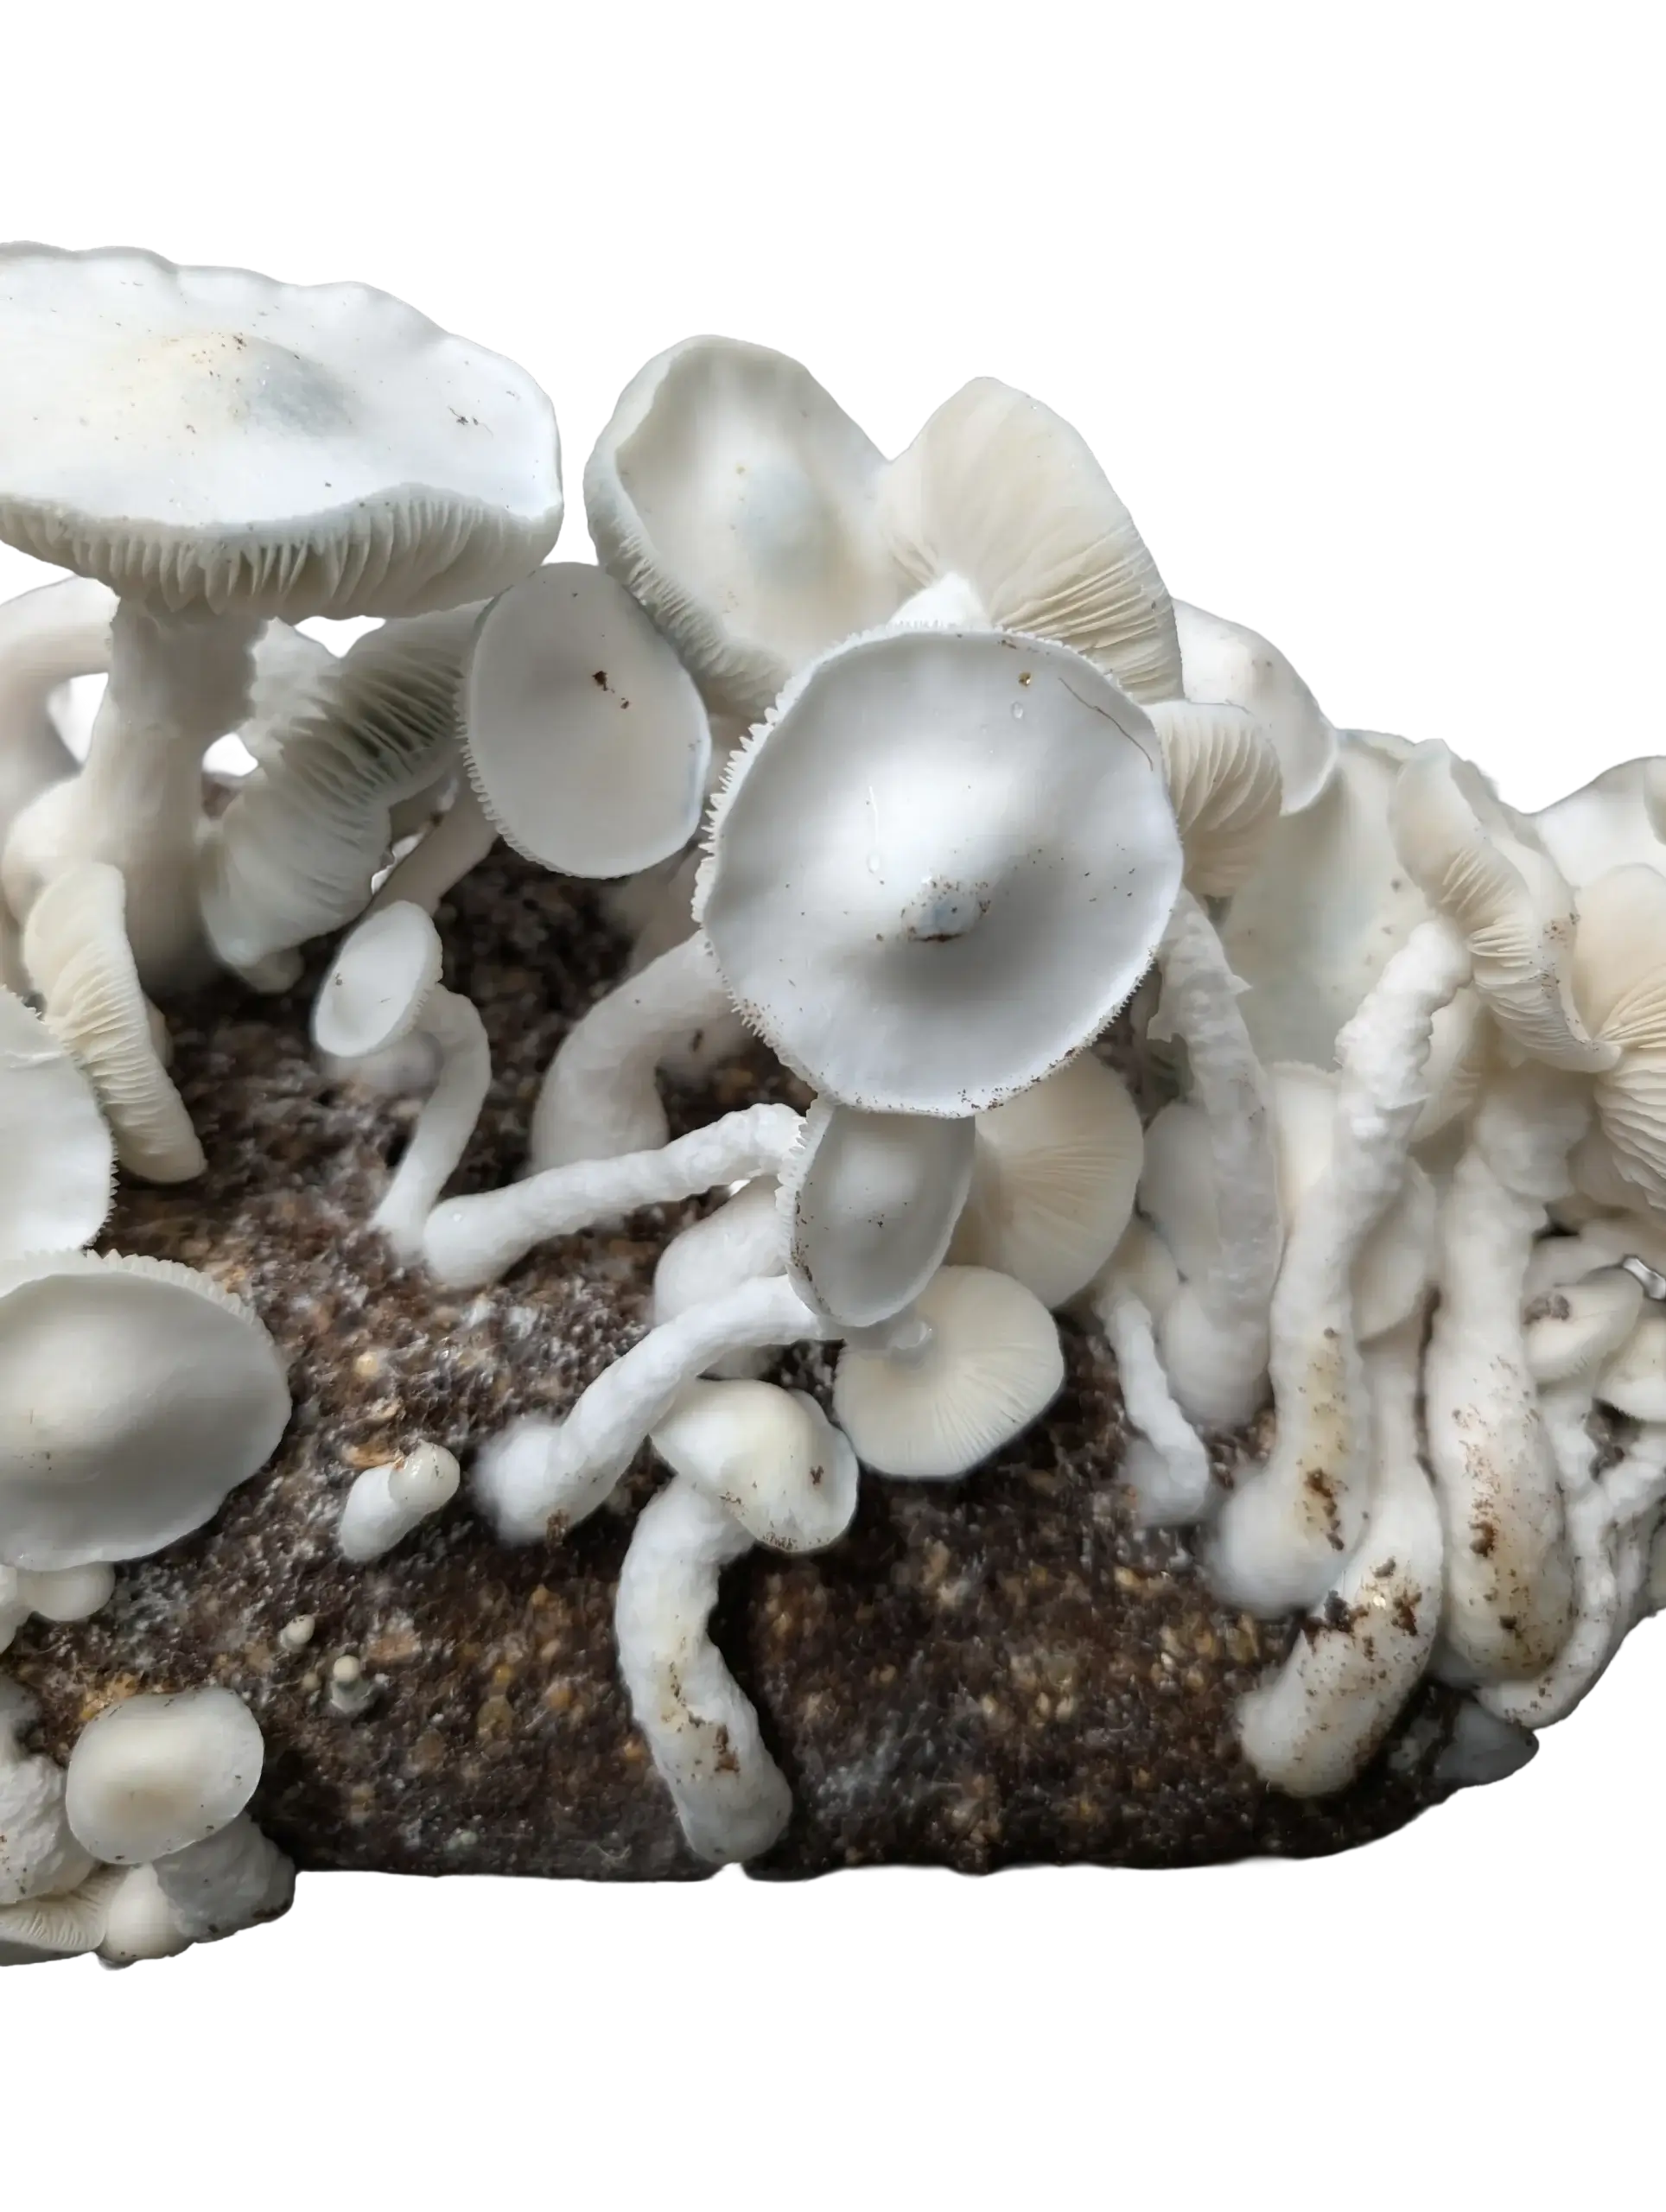
Dense Fruit Structure: Produces thick-stemmed, well-formed fruits with solid caps that hold their shape through development and drying. Clusters are common and visually striking.
Essential Equipment and Substrate Preparation for Yeti 168
Yeti 168 grows well on the same substrates and equipment setups that work for any standard Psilocybe cubensis variety. You do not need specialized temperature controllers, automated humidity systems, or laboratory-grade sterilization equipment. A basic monotub setup with proper preparation will produce excellent results.
For grain spawn, whole oats, rye berries, or millet all work reliably. The key is thorough hydration and complete sterilization at 15 PSI for 90 minutes. Yeti 168 colonizes grain at a moderate pace, so giving contamination zero foothold during the spawn stage matters. Use a still air box or laminar flow hood for inoculation, and you'll eliminate the vast majority of contamination risk before the grow even starts.
Bulk substrate should be a standard CVG mix: coco coir, vermiculite, and gypsum. Pasteurize at 160-170°F for 60-90 minutes, then cool to room temperature before spawning. Field capacity moisture is the target. Squeeze a handful and you should get a few drops of water, not a stream. Yeti 168 is not especially sensitive to minor moisture variations, but starting at proper field capacity gives the best pinset density.
Yeti 168 Equipment Checklist
Sterilization: Pressure cooker capable of 15 PSI. A 23-quart Presto handles most home-scale grows. Pair with isopropyl alcohol (70%) and a lighter or alcohol lamp for transfer work.
Inoculation Environment: A still air box (SAB) built from a clear storage tote works perfectly. Cut two arm holes, wipe everything down with alcohol, and work inside the box for all transfers.
Fruiting Chamber: A standard 66-quart monotub with holes drilled for air exchange. Stuff holes with polyfill for passive FAE, or use micropore tape over smaller holes.
Monitoring: A basic digital thermometer/hygrometer combo (under $15 at any hardware store) is all you need to track conditions during fruiting.
Want to see how Yeti 168 stacks up against other popular strains? Explore our complete strain comparison guide for side-by-side breakdowns.
Inoculating Yeti 168: Setting the Foundation
Yeti 168 performs well with liquid culture inoculation, which gives it a colonization speed advantage over starting from spores. Liquid culture delivers live mycelium directly onto the grain, so there's no germination waiting period. You'll typically see visible growth within 3-5 days of inoculation, compared to 7-10 days when starting from a multi-spore syringe.
Inject 1-2 cc of liquid culture per quart jar of grain spawn. Distribute the solution across 2-4 injection points on opposite sides of the jar to create multiple colonization fronts. This speeds up full colonization and reduces the window where uncolonized grain sits vulnerable to contamination.
Store inoculated jars at 75-78°F in a dark location. You don't need precise temperature control here. A closet shelf, a cabinet top, or any room-temperature spot away from direct sunlight works fine. Avoid placing jars directly on cold concrete floors, which can create a temperature differential that slows colonization on the bottom of the jar.
Full colonization typically takes 10-16 days depending on your grain type and inoculation rate. Once you see 100% coverage, perform a break and shake to redistribute the mycelium, then wait another 3-5 days for the grain to reconsolidate. This second colonization pass ensures every grain kernel is fully claimed before you move to bulk substrate.
Yeti 168 Inoculation Best Practices
Liquid Culture Advantage: Starting from liquid culture rather than spores cuts colonization time significantly and delivers more consistent results. Yeti 168 liquid culture is the fastest path to healthy mycelium.
Inoculation Rate: Use 1-2 cc per quart jar. More is not better. Excess liquid culture can pool at the bottom of the jar and create conditions favorable to bacterial contamination.
Temperature Range: 75-78°F is the sweet spot for colonization. Yeti 168 will still colonize at temperatures as low as 70°F, just at a slower pace. Avoid exceeding 80°F, which can stress the mycelium.
Patience with Progress: Albino mycelium can be harder to spot visually on light-colored grains during early colonization. Give it a full week before evaluating progress, and look for subtle textural changes on grain surfaces.
Spawning to Bulk Substrate
Once your grain spawn is fully colonized and reconsolidated after the break and shake, it's time to move to bulk substrate. Mix colonized grain with pasteurized CVG substrate at a ratio between 1:2 and 1:3 (spawn to substrate by volume). A 1:2 ratio colonizes faster but uses more spawn. A 1:3 ratio stretches your spawn further while still colonizing within a reasonable timeframe.
Layer or mix the spawn evenly throughout the substrate in your monotub. Some growers prefer to mix everything thoroughly, while others alternate layers of substrate and spawn. Both methods work with Yeti 168. After mixing, apply a thin casing layer of pure coco coir (about 1/4 inch) across the top surface. This casing layer helps maintain surface moisture during colonization and provides a consistent microclimate for pinning.
Seal the tub and let it colonize undisturbed for 7-10 days. You'll see white mycelium working across the surface during this period. Resist the urge to open the tub and check constantly. Every time you crack the lid, you're introducing fresh air that can trigger premature pinning before the substrate is fully colonized. Wait until you see at least 75-80% surface coverage before introducing fruiting conditions.
Mastering Yeti 168 Fruiting Conditions
Fruiting Yeti 168 follows the same environmental triggers that work for standard cubensis varieties. Introduce fresh air exchange by opening your polyfill-stuffed holes or cracking the lid slightly. Begin a 12/12 light cycle using any ambient light source. Even indirect room lighting or a small LED desk lamp pointed near (not directly at) the tub is sufficient. The light serves as a directional cue for fruit development, not an energy source.
Temperature during fruiting should sit between 70-75°F. Yeti 168 is not as temperature-sensitive as many other albino strains. You do not need precision controllers or heating mats with thermostats. If your room stays in this general range, the strain will fruit reliably. Slightly cooler temps (down to 68°F) slow development but don't cause problems. Slightly warmer temps (up to 78°F) speed things up without affecting albino expression in this stabilized genetics line.
Humidity should stay between 85-95% during the pinning stage. In a properly prepared monotub, the substrate moisture and sealed environment handle most of this naturally. If you notice the surface drying out, mist the sides and lid of the tub (not the substrate surface directly) and fan briefly to promote evaporation. Surface evaporation is the primary pinning trigger, so maintaining that thin moisture layer on the substrate surface without waterlogging it is the balance you're aiming for.
Pins should appear within 5-10 days of introducing fruiting conditions. Yeti 168 tends to pin in clusters rather than scattered individual fruits, which makes harvest timing more straightforward. Once pins appear, maintain your FAE and humidity routine and let the fruits develop without intervention.
Yeti 168 Fruiting Parameters
Temperature: 70-75°F is ideal. This strain tolerates a wider range than most albino genetics without losing albino expression, so don't stress about minor fluctuations.
Humidity: 85-95% during pinning, dropping naturally to 80-90% as fruits develop. Let the monotub microclimate do most of the work.
Fresh Air Exchange: Passive FAE through polyfill or micropore tape works well. Yeti 168 does not require aggressive fanning. If you see fuzzy feet (aerial mycelium at the base of stems), increase FAE slightly.
Lighting: 12 hours on, 12 hours off. Any indirect light source works. The pure white fruits look particularly striking under cool white LED lighting.
Harvesting Yeti 168: Timing Is Everything
Harvesting albino strains requires slightly different visual cues than pigmented varieties, since you can't rely on color changes to signal maturity. With Yeti 168, focus on cap shape and veil condition. Immature fruits have rounded, convex caps with intact veils connecting the cap edge to the stem. As fruits mature, caps flatten and begin to spread outward. The veil stretches thin and eventually tears away from the cap edge.
The ideal harvest window is just as the veil begins to tear but before caps flatten completely. At this stage, fruits have reached their maximum size and density without losing structural integrity. Waiting longer won't increase size meaningfully, but it will cause caps to thin out, spores to drop (creating a mess on surrounding fruits), and overall specimen quality to decline.
For clusters, harvest the entire cluster when the largest fruits reach maturity. Trying to selectively pick individual fruits from a tight cluster risks damaging neighboring pins and reducing your overall yield. Twist and pull the entire cluster from the substrate with a gentle rocking motion. A clean break at the substrate surface is ideal. If stubby bases remain, they'll decompose harmlessly during subsequent flushes.
Yeti 168 typically produces 3-5 productive flushes from a single tub. After each harvest, soak the substrate in clean water for 6-12 hours to rehydrate, then drain and resume fruiting conditions. Subsequent flushes often produce fewer but larger individual fruits.
Yeti 168 Harvest Indicators
Veil Condition: Harvest when the veil connecting cap edge to stem begins to stretch and tear. This is the most reliable maturity indicator for albino strains where color changes aren't visible.
Cap Shape: Caps transition from rounded/convex (immature) to flat (mature) to upturned (over-mature). Target the flat stage for best specimen quality.
Stem Firmness: Mature Yeti 168 fruits maintain firm, dense stems. If stems feel soft or spongy, check for excessive humidity or bacterial issues rather than assuming over-maturity.
Cluster Timing: Harvest entire clusters based on the largest fruit's maturity. Don't wait for every fruit in the cluster to reach the same stage.
Troubleshooting Common Yeti 168 Growing Problems
Yeti 168 is forgiving by albino standards, but a few common issues can still come up. Here's how to identify and fix them quickly.
Slow Colonization
If grain jars show little to no growth after 10 days, check your storage temperature first. Jars sitting below 70°F will colonize slowly. Move them to a warmer location (75-78°F) and give them another week. If there's still no growth after three weeks, the culture may not have been viable, or contamination may have established before visible mycelium could take hold. Start fresh with a new jar.
Prevention: Use properly hydrated grain, sterilize for a full 90 minutes at 15 PSI, and inoculate in a clean still air box. These three steps eliminate the vast majority of colonization failures.
Weak or Sparse Pinset
A thin pinset usually means insufficient surface conditions rather than a genetic problem. The most common cause is dry substrate surface. Mist the walls and lid of the tub, then fan for 30-60 seconds to promote surface evaporation. If pinning doesn't improve within a few days, try a brief cold shock by dropping temperature 5-8°F for 12-24 hours, then returning to normal fruiting temps.
Prevention: Ensure substrate is at proper field capacity when you spawn to bulk, and apply a thin casing layer to maintain consistent surface moisture throughout colonization.
Fuzzy Feet (Aerial Mycelium at Stem Bases)
White fuzz growing up the base of developing stems indicates insufficient fresh air exchange. The fruits are reaching upward trying to find fresh air. This is cosmetic rather than harmful, but it does indicate suboptimal conditions that can reduce overall yield quality.
Fix: Increase FAE by opening polyfill holes wider, adding additional holes, or fanning the tub more frequently. Even 2-3 additional brief fanning sessions per day can resolve fuzzy feet within a flush or two.
Aborted Pins (Small Pins That Stop Growing and Darken)
Aborted pins are small fruit bodies that stop developing prematurely. They're normal in small numbers, especially in dense pinsets where the mycelium network can't support every pin to maturity. If you're seeing large numbers of aborts across the entire surface, the most likely cause is a sudden environmental change: temperature swing, humidity crash, or contamination stress.
Fix: Stabilize your environment and maintain consistent conditions. Remove aborted pins during harvest to prevent them from becoming contamination vectors on subsequent flushes.
Ready to start growing? Get Yeti 168 liquid culture and put this guide into action.
Comparing Yeti 168 to Other Albino and Premium Strains
Choosing between albino strains comes down to your experience level and what you're looking for in a grow. Here's how Yeti 168 fits into the broader landscape of popular albino and premium genetics.
Albino Bluey Vuitton is a shorter, squatter albino variety with a different genetic background (Panama x Melmac PE hybrid). Where Yeti 168 produces taller fruits with classic Teacher morphology, ABV tends toward dense, compact specimens. Both strains are beginner-accessible, but ABV's PE lineage gives it slightly different fruiting behavior and harvest indicators. If you want to compare two different approaches to albino cultivation, running these strains side by side makes for a fascinating study.
Gandalf takes a completely different approach to unusual cubensis genetics. Rather than albino expression, Gandalf is prized for its unique morphology and growing characteristics that set it apart from standard varieties. Pairing Yeti 168 with Gandalf gives you two very different but equally interesting strains to study, and both respond well to standard cubensis cultivation techniques.
For cultivators already comfortable with standard varieties who want to explore albino genetics without a steep learning curve, Yeti 168 is the most natural next step. Its True Albino Teacher lineage connects it to one of the most established and well-documented genetic lines in cubensis mycology, and the stabilization work behind the 168 isolation means you're getting albino results with standard-strain effort.
Drying and Storing Yeti 168
Proper drying preserves specimen quality and that striking white appearance. Use a food dehydrator set to 130-140°F with good airflow. Spread harvested fruits across the trays in a single layer without overlapping. Smaller fruits dry in 4-6 hours. Larger specimens and dense clusters may take 8-12 hours. Fruits are fully dry when they snap cleanly rather than bending.
Yeti 168's white coloration is best preserved with gentle, consistent drying. Avoid high temperatures above 160°F, which can cause browning and discoloration that diminishes the visual quality of albino specimens. If you don't have a dehydrator, a box fan with a furnace filter works as a slower alternative. Avoid oven drying, which is difficult to control and often produces uneven results.
Store fully dried specimens in airtight glass jars with food-grade desiccant packets. Keep jars in a cool, dark location. Properly dried and stored Yeti 168 specimens maintain their appearance and structural integrity for months. Label each jar with the strain name, harvest date, and flush number for your records.
Final Thoughts on Growing Yeti 168
Yeti 168 is proof that albino cultivation doesn't have to be an advanced-only pursuit. This strain was refined specifically to deliver true albino results without the volatility that makes most white-fruiting genetics unreliable. If you follow the techniques in this guide, maintain basic environmental consistency, and start with quality Yeti 168 liquid culture, your first albino grow should produce the kind of pristine white specimens that make this strain so highly regarded in the cultivation community.
The skills you develop growing Yeti 168 translate directly to other premium and albino strains. Proper sterile technique, substrate preparation, and environmental management are universal fundamentals. Once you've dialed in a successful Yeti 168 grow, expanding into other varieties becomes a matter of adjusting parameters rather than learning from scratch.
Start Your Yeti 168 Grow
Experience true albino cultivation with one of the most reliable and visually striking strains available. Yeti 168 liquid culture gives you the fastest path from inoculation to harvest-ready mycelium.
Get Yeti 168 Liquid Culture NowContinue Your Mycology Journey
- Albino Bluey Vuitton Cultivation Guide - Explore a different approach to albino cubensis genetics
- Gandalf Strain Guide - Discover one of mycology's most unique cubensis morphologies
- Complete Strain Comparison Guide - Side-by-side breakdowns of premium cubensis varieties
- Elite Start Bundle - Enigma, APE, and Golden Teacher liquid cultures in one package
- Full Liquid Culture Collection - Browse our complete selection of premium strains
References
- Kurzbaum E. et al. (2025). "Exploring Psilocybe cubensis Strains: Cultivation Techniques, Psychoactive Compounds, Genetics and Research Gaps." PMC/NIH.
- Cohen J. et al. (2025). "Comprehensive analysis of 42 psilocybin-producing fungal strains." Nature Scientific Reports.
- Goff R. et al. (2024). "Determination of psilocybin and psilocin content in multiple strains of Psilocybe cubensis." Analytical Chemistry.
- Beckley Foundation (2025). "Types of Psychedelic Mushrooms: A Species Guide."