Timing isn't just everything in mushroom cultivation—it's survival. The faster your mycelium colonizes, the lower your contamination risk, the better your yield, and the smoother your grow. Let's break down how your choice of inoculation method dramatically affects your colonization timeline.
The Race to Full Colonization
And let's be honest—no one likes babysitting a slow jar wondering if it's stalling or thriving.
Colonization speed matters for three critical reasons:
- Contamination risk: The faster your mycelium colonizes, the less opportunity contaminants have to take hold
- Efficiency: Quicker colonization means faster harvests and more growing cycles per year
- Yield potential: Healthy, vigorous colonization often translates to better fruiting results
If you've been wondering which inoculation method offers the fastest colonization time, you're not alone. Let's find out which one's the real speedster in the lab.
What Is Colonization in Mushroom Growing?
Before we get into the numbers, let's zoom out for a second. Colonization is the process where mycelium—think of it like the root system of a mushroom—spreads through its food source, or substrate. This is where the magic starts.
Common substrates like sterilized grain (rye, oats, millet) are the go-to for most cultivators because they offer great nutrition and structure for mycelial growth. But how you introduce the mycelium (or the spores that become mycelium) changes everything.
Your main options?
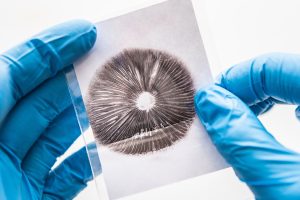
- Spore syringes: these contain spores suspended in solution
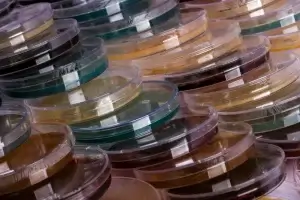
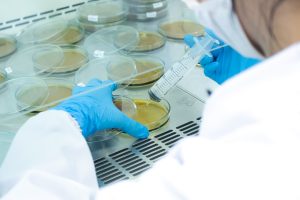
- Agar plates: used for isolating clean, aggressive mycelium
- Liquid cultures (LC): nutrient-rich broth with live mycelium already growing
So, how do these methods stack up in terms of colonization speed?

Spore Syringe to Grain: A Patient Start

Average colonization time: 14–21 days (or longer)
Spore syringes are a staple for hobbyists and researchers, but they're not the fastest route to colonization. That's because the spores in a syringe need to germinate first, and that process alone can take a few days to over a week. Learn the exact steps in our spore syringe inoculation guide—materials, sterile technique, and best practices included.
Important: A Word on Sterility and Agar Testing
Before we go further, I need to emphasize something crucial: spore syringes typically aren't sterile. Even professionally prepared syringes can contain contaminants alongside the desired spores. This is why experienced cultivators always recommend testing spore syringes on agar before introducing them directly to grain.
When you put spores directly to grain, you're gambling with your time and resources. If contamination is present (bacterial, mold, or otherwise), you might not discover it until weeks into the process. By then, you've wasted precious time and materials.
By first putting a drop of your spore solution on agar, you can:
- Visually confirm if contaminants are present
- Isolate clean mycelium sectors if contamination appears
- Ensure only healthy mycelium makes it to your grain
If you do choose to go straight to grain (understanding the risks), several factors will affect your colonization speed:
- Spore density: Darker syringes generally contain more spores and may colonize faster
- Age of syringe: Fresher spores typically germinate more quickly and vigorously
- Incubation temperature: Most species colonize fastest between 75-80°F (24-27°C)
- Injection technique: Distributing spore solution throughout the substrate rather than in one spot
Cultivator's Tip: When using spore syringes, shake your grain jars at approximately 30% colonization to distribute the mycelium throughout the substrate and speed up the colonization process.
Need premium spore syringes for your research?
Get lab-prepared, contaminant-tested syringes with verified spore density for consistent results.
Browse Research-Grade SyringesLiquid Culture to Grain: The Speed Demon

Average colonization time: 7–14 days
Liquid culture is often the method of choice for cultivators who want speed and consistency. Why? Because unlike a spore syringe, an LC already contains living, active mycelium. That means no waiting around for germination.
Once introduced into sterilized grain, a clean LC can start spreading within 24–48 hours. But—and this is a big but—your LC needs to be contamination-free. Bacteria in LC is one of the most common headaches in mycology.
The timeline with liquid culture typically looks like this:
- Days 1-3: First visible signs of mycelium growth
- Days 4-7: Significant colonization progress (30-50%)
- Days 7-14: Full colonization
Liquid culture offers these advantages:
- No germination delay: The mycelium is already active and growing
- Genetic uniformity: Unlike spores, LC produces consistent results
- Vigor: Properly made LC contains healthy, aggressive mycelium
Agar to Grain: The Sweet Middle Ground
Average colonization time: 10–16 days
Transferring mycelium from an agar plate to a grain jar is a happy medium between the slow unpredictability of spores and the high-speed risks of LC.
A well-isolated agar wedge (or multiple wedges!) taken from a clean culture can colonize grain pretty quickly—especially when the mycelium is rhizomorphic (stringy and aggressive), you're using multiple points of contact, and your grain is properly prepped and hydrated.
So... What's the Fastest Colonization Method?
If your goal is speed and you're working in a clean environment, liquid culture wins. But if you're prioritizing control and visual inspection, agar is your best friend.
Spore syringes? They're the most accessible and beginner-friendly, but they take the longest and carry more variability.
| Inoculation Method | Average Colonization Time | Notes |
|---|---|---|
| Spore Syringe | 14–21 days | Needs germination, best tested on agar first |
| Liquid Culture | 7–14 days | Fast, but must be clean |
| Agar Plate | 10–16 days | Visual quality check, good control |
Colonization Environmental Factors
Regardless of which inoculation method you choose, these environmental factors significantly impact colonization times:
Temperature
- Optimal range: Most mushroom species colonize fastest at 75-80°F (24-27°C)
- Too cold (below 70°F/21°C): Dramatically slows growth
- Too hot (above 85°F/29°C): Stresses mycelium and favors contaminants
Substrate Preparation
- Moisture content: Too dry = slow growth; too wet = bacterial contamination
- Sterilization: Incomplete sterilization leads to competition from contaminants
- Nutrient availability: Properly prepared grain with sufficient nutrition supports faster growth
Gas Exchange
- Sufficient oxygen: Mycelium needs oxygen for healthy growth
- Filter patch quality: Good microporous filters allow optimal gas exchange while preventing contamination
Speeding Up Colonization: Pro Tips
Regardless of which method you choose, here are my tried-and-true techniques for maximizing colonization speed:
- Strategic shaking: Shake at 20-30% colonization to distribute mycelium
- Temperature management: Invest in a temperature controller for consistent conditions
- Grain preparation: Perfect your grain hydration for ideal moisture content
- Inoculation points: Use multiple injection/transfer sites in larger containers
- Culture selection: Keep and propagate your fastest-colonizing cultures
Final Thoughts: Speed Isn't Everything
Sure, everyone loves fast colonization. But clean technique, proper sterilization, and choosing the right strain or species matter just as much. Sometimes taking the "slower" path—like starting from agar—leads to better outcomes down the line.
After years of cultivation, I've found that a hybrid approach often works best—using agar to isolate clean, aggressive cultures, expanding to liquid culture for speed and volume, then inoculating grain for the final grow.
This approach gives you the best of all worlds: the genetic selection of agar, the speed of liquid culture, and the reliability of grain spawn.
Whether you're a first-time cultivator or a seasoned mycophile dialing in your workflow, understanding colonization timelines can help you set expectations, prevent contamination, and maximize your success.
What's your experience with different colonization methods? Have you found one that consistently outperforms the others in your setup? Share your thoughts in the comments below!
This article is provided for educational and informational purposes only. Always research and comply with all applicable laws in your jurisdiction regarding mushroom cultivation.


